
Book a Free Call
No commitment required
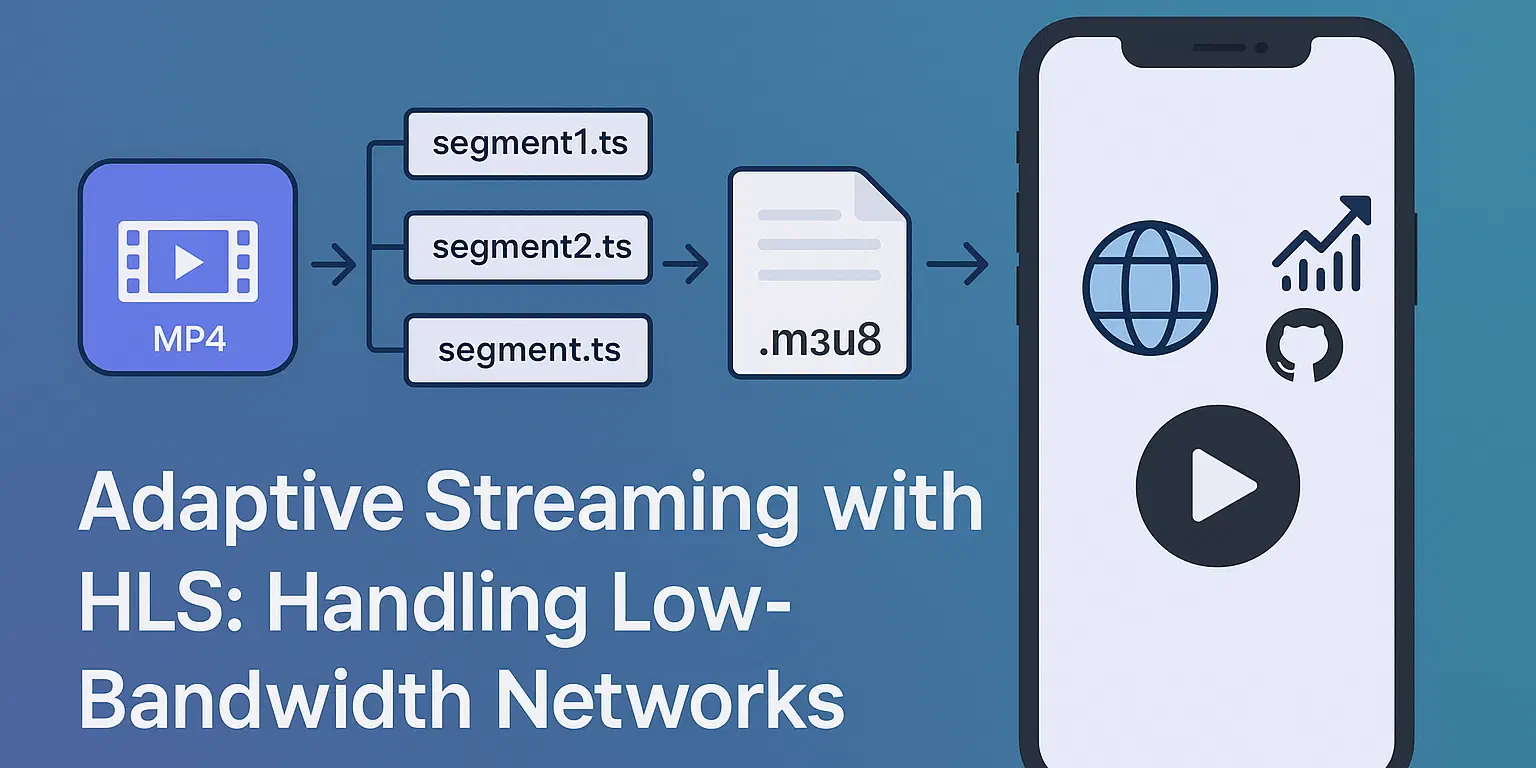
HLS (HTTP Live Streaming) is a media streaming protocol originally developed by Apple, but now widely supported across platforms and devices. It delivers video and audio over the internet by breaking the media into small chunks (typically .ts files) and referencing them through a .m3u8 playlist. These small HTTP-based downloads allow for continuous playback, enabling the stream to adapt to network conditions and device capabilities.
Today, most modern video players including those used in web, mobile, and smart TV applications, support HLS out of the box, making it a reliable and scalable choice for adaptive streaming.
M3U8 is a file format used in HLS. It’s essentially a playlist file written in UTF-8 encoded M3U format. The “M3U” part stands for “MP3 URL” (from earlier usage in audio playlists), and the “8” just indicates it uses UTF-8 encoding.
An M3U8 file contains a list of media segment URLs or other playlists (in the case of adaptive streaming). It gives the video player instructions on how to load and play the video segments. Depending on the content of the M3U8 file, the player can automatically switch between different quality levels to match the viewer’s network conditions.
M3U8 example:
#EXTM3U
#EXT-X-VERSION:3
#EXT-X-TARGETDURATION:10
#EXT-X-MEDIA-SEQUENCE:0

#EXTINF:10.0,
segment0.ts
#EXTINF:10.0,
segment1.ts
#EXTINF:10.0,
segment2.ts

#EXT-X-ENDLIST
#EXTM3U: This line tells “This is an M3U8 playlist.”
#EXT-X-VERSION:3: Version of the HLS protocol that’ll be used.
#EXT-X-TARGETDURATION:10: Segments are about 10 seconds long.
#EXT-X-MEDIA-SEQUENCE:0: The first segment starts with sequence number 0.
Then the playlist lists segments:
#EXTINF:10.0: This says “The next video segment is 10 seconds long.”
segment0.ts, segment1.ts, etc: These are actual video files (MPEG-TS (.ts) format) that the player will download and play in order.
#EXT-X-ENDLIST: This tells the player that the playlist is complete (not a live stream).
We can use the M3U8 to offer multiple versions of the video at different bitrates. The player can choose the best one based on the user’s internet speed.
#EXTM3U
#EXT-X-STREAM-INF:BANDWIDTH=800000
low/playlist.m3u8
#EXT-X-STREAM-INF:BANDWIDTH=1600000
mid/playlist.m3u8
#EXT-X-STREAM-INF:BANDWIDTH=3000000
high/playlist.m3u8
#EXT-X-STREAM-INF: This tag introduces an alternate stream, usually with a different resolution or bitrate.
BANDWIDTH=800000: This specifies the average bitrate required to play this version of the stream.
800000 bps = 800 kbps (which might be suitable for low to medium quality, e.g. 480p video).M3U8 file is generated using the tool FFmpeg. So you’ll need the media files (often .mp4) and the FFmpeg tool to generate the M3U8 playlist file.
Now that everything is in place, let’s look at a common issue this approach helps address: improving playback quality when network conditions are poor. One of the main problems users face is experiencing long load times or playback failures when the bandwidth is limited. To simulate these worst-case conditions during testing, a 3G network is often used as a baseline. While 3G itself isn’t the target, it represents the kind of constrained environment where low-bitrate streaming and low-latency HLS can significantly enhance the experience—even for users on slightly better but still unreliable connections.
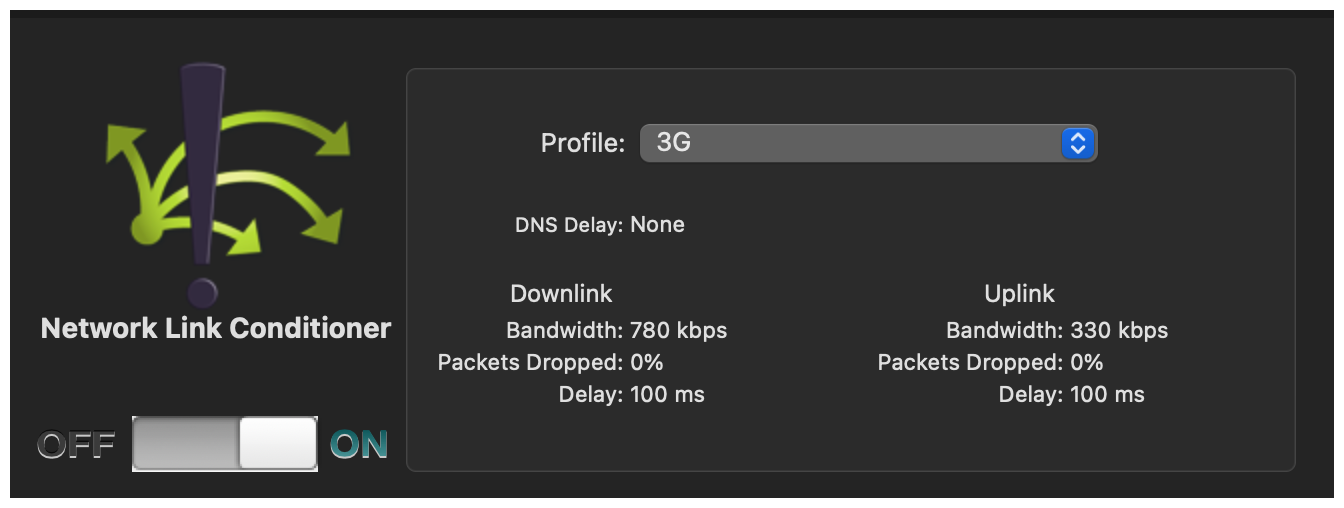
To simulate slow network conditions, we used the Network Link Conditioner tool with a 3G profile. This tool is included in the Additional Tools for Xcode package, which can be downloaded from the Apple Developer site.
We also installed ffmpeg via Homebrew (brew install ffmpeg) to handle video segmentation and prepare for scenarios where network conditions may fluctuate or degrade.
Next, we navigated to the directory containing the video file and ran the following ffmpeg command:
ffmpeg -i myVideo.mp4 \
  -filter_complex "[0:v]split=3[v1][v2][v3]; \
                   [v1]scale=w=640:h=360[v1out]; \
                   [v2]scale=w=854:h=480[v2out]; \
                   [v3]scale=w=1280:h=720[v3out]" \
  -map "[v1out]" -map a -c:v:0 libx264 -b:v:0 400k -c:a:0 aac -b:a:0 128k -f hls \
    -hls_time 10 -hls_playlist_type vod -hls_segment_filename "360p_%03d.ts" 360p.m3u8 \
  -map "[v2out]" -map a -c:v:1 libx264 -b:v:1 800k -c:a:1 aac -b:a:1 128k -f hls \
    -hls_time 10 -hls_playlist_type vod -hls_segment_filename "480p_%03d.ts" 480p.m3u8 \
  -map "[v3out]" -map a -c:v:2 libx264 -b:v:2 1500k -c:a:2 aac -b:a:2 128k -f hls \
    -hls_time 10 -hls_playlist_type vod -hls_segment_filename "720p_%03d.ts" 720p.m3u8
This script outputs three HLS variants at different resolutions (360p, 480p, and 720p) each with its own playlist and .ts segment files. This setup enables adaptive streaming based on the user’s current network conditions.
And voilà! we now had segmented versions of myVideo.mp4 in 360p, 480p, and 720p. For each resolution, ffmpeg generated a set of .ts segment files along with a corresponding .m3u8 playlist file.
The next step was to create a master playlist that tells the player which variant stream to use based on the available bandwidth. We manually wrote the following in a code editor:
#EXTM3U
#EXT-X-STREAM-INF:BANDWIDTH=500000,RESOLUTION=640x360
360p.m3u8
#EXT-X-STREAM-INF:BANDWIDTH=900000,RESOLUTION=854x480
480p.m3u8
#EXT-X-STREAM-INF:BANDWIDTH=1600000,RESOLUTION=1280x720
720p.m3u8
We saved this as master.m3u8. This playlist allows the video player to automatically switch between the appropriate video quality based on the user’s network conditions.
The last step was to host the files externally so we could get a public URL to test with AVPlayer on iOS.
To do this, we created a Git repository, committed the generated video segments and playlists, and published them using GitHub Pages.
This URL points to the master.m3u8 playlist, allowing AVPlayer to handle adaptive streaming based on current network conditions.
With all these steps completed, we ran the app in the iOS Simulator to verify that everything was working as expected:
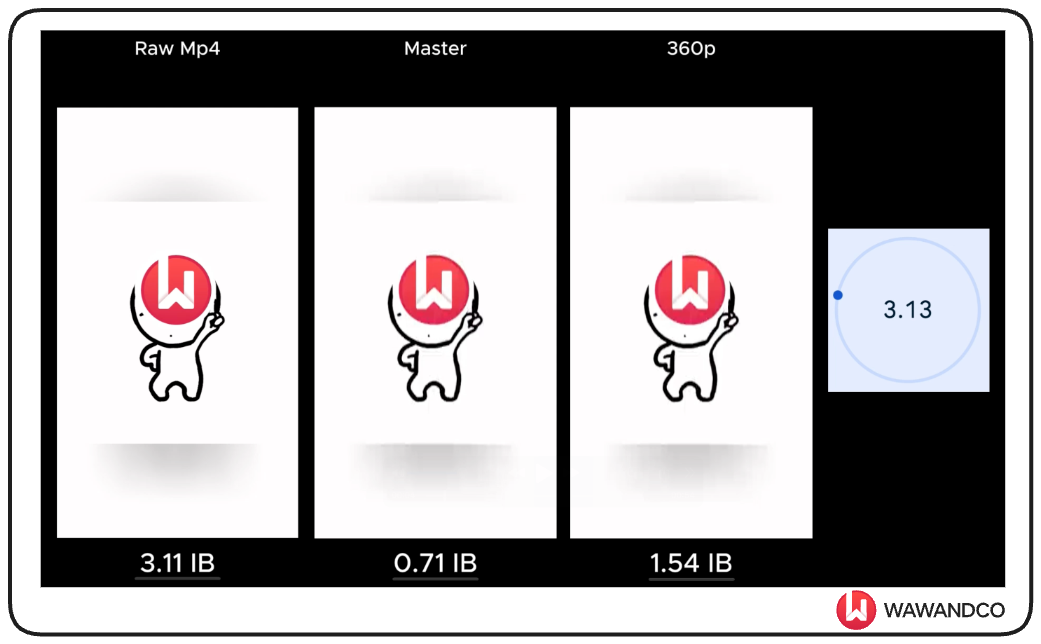
Here are the results observed in the iOS Simulator when testing initial buffer times under constrained network conditions:
Raw .mp4 file (myVideo.mp4):
Took 3.11 seconds to display the initial buffer.
Master playlist (master.m3u8) with multiple quality levels:
Took only 0.71 second to display the initial buffer.
Lowest-quality segment (360.m3u8):
Took 1.54 seconds to display the initial buffer.
The initial buffer times showed promising results—even under slow network conditions—remaining within an acceptable range. While no alarms are raised at this point, it’s important to note that subsequent buffers required for continuous playback may still take longer to load.
The real benefits of this approach became more apparent when comparing it to progressive playback. Take a look:
That’s a huge difference!
This clearly demonstrates that HLS (HTTP Live Streaming) is a powerful alternative when aiming to deliver a smooth and responsive streaming experience—especially over unstable or slow networks. If you’re building a video-first product, it’s definitely worth keeping in mind.