Book a Free Scoping Call
No commitment required
You might have read an article I wrote before on how to run your buffalo container on CloudRun, however a lot has changed in CloudRun since I wrote that article and I noticed that I missed important details that will be needed to run your application there. In this article I will cover how to run your buffalo application in CloudRun (GA now).
I think is important to describe a bit of the app we’re deploying in order to understand what we’re trying to accomplish.
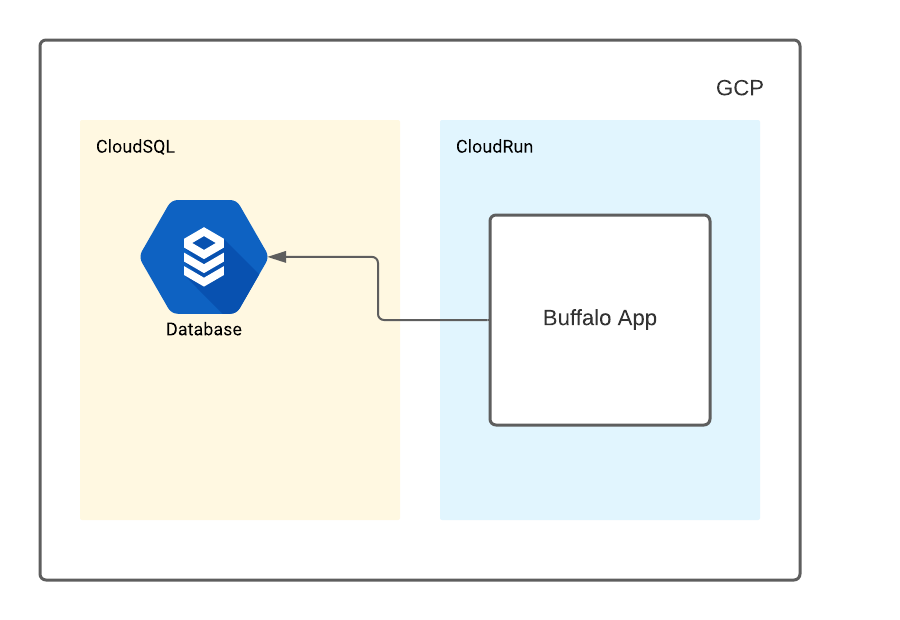
The application we’re going to deploy to CloudRun is a Buffalo Web application that connects with a PostgreSQL database instance which is managed by CloudSQL. The container we will run uses a built buffalo application binary produced by the buffalo build command.
Now that we know a bit about the app we’re about to deploy we might have noticed that the application has a dependency on a PostgreSQL database, and it runs as a binary inside a container image we will need to build.
One important change we will need later is changing our database.yml. We will apply two changes to that file, we will change the production block of it to be:
production:
  dialect: postgres
  pool: {{envOr "DATABASE_CONNECTION_POOL" "10"}}
  url: {{envOr "DATABASE_URL" "postgres://postgres:postgres@127.0.0.1:5432/platform_production?sslmode=disable"}}
The dialect attribute will come handy when connecting to our database later on, and the pool one will give us a bit of control over this for configuration purposes.
Buffalo ships with a Dockerfile that comes very handy to run our application in CloudRun. However, we will do a small change to it to make things simpler for this example.
At the bottom of the file we will change:
CMD exec /bin/app
to be
CMD /bin/app migrate; /bin/app
This will ensure that when our container starts it will run migrations to ensure our database is up to date with the version that the container binary is running.
Once we have done those changes in our codebase we need to ensure we’ve logged in GCP. Once we’re logged in we can build our Docker image by running:
docker build . -t gcr.io/buffalo/buffalo-app:v1.0.0
And once that completes we can push it with
docker push gcr.io/buffalo/buffalo-app:v1.0.0
This will just push the image we’ve built into the google container registry. To run it inside a CloudRun service we should execute:
gcloud run deploy buffalo-app --region us-central1 --platform managed --allow-unauthenticated --image gcr.io/buffalo/buffalo-app:v1.0.0
That will deploy our container, which is likely to fail when running because it will need a PostgreSQL database to connect to and it will not find it.
The only external dependency this app has a PostgreSQL database that it will use to persist application data. The following steps describe how to set it up correctly so we are able to connect to it from our service.
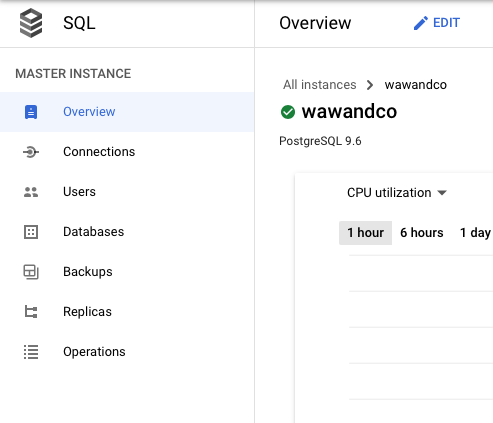
As we mentioned before this app will require a PostgreSQL database, if we don’t have an instance to use we will need to create it by going to the Google Cloud SQL portal and going to the “Create Instance” action.
💅 Pro tip: When creating the DB, we need to ensure that the zone we’ve created our database in matches the one we have chosen for our service, otherwise we will have troubles when connecting both.

Once that’s done we will need to create a database and user that our app will use to connect with the instance we have just created. The CloudSQL portal allows to do this by going to the “databases” and “users” section on the left navigation panel.
💅 Pro-tip: As a recommendation try and create a username/password combination for each of the services you run. This will allow you to better differentiate the database usage of your instance by username, as well as having the possibility for better access control if needed.
Once you have created the database its important that we enable the google cloud SQL Admin API. This is important to be able to connect the service we’ve created in CloudRun securely with the SQL instances we’ve created in CloudSQL.
To do so you should go to this page and enable it for the project you’re working on.
Now that we have deployed our container and set up the database it will use, we need to tell our CloudRun service how to connect with that database we just created. To do so we need to add a CloudRun Connection.
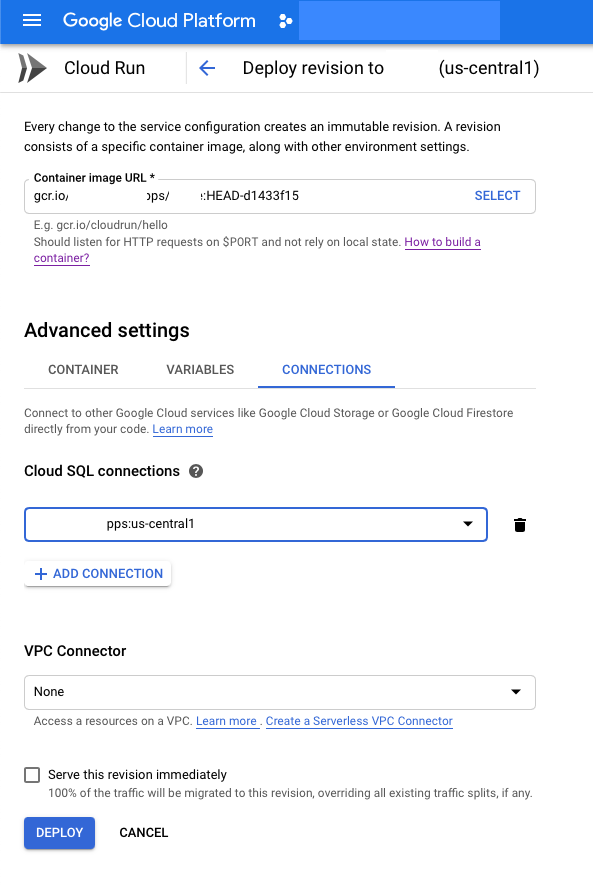
Edit/Deploy new revisionConnections TabAdd ConnectionThat will set up the connection but hold on, next are environment variables.
The last piece of the puzzle is setting environment variables for our service to run correctly. To set these up you will need to go to the VARIABLES tab of the service revision settings.
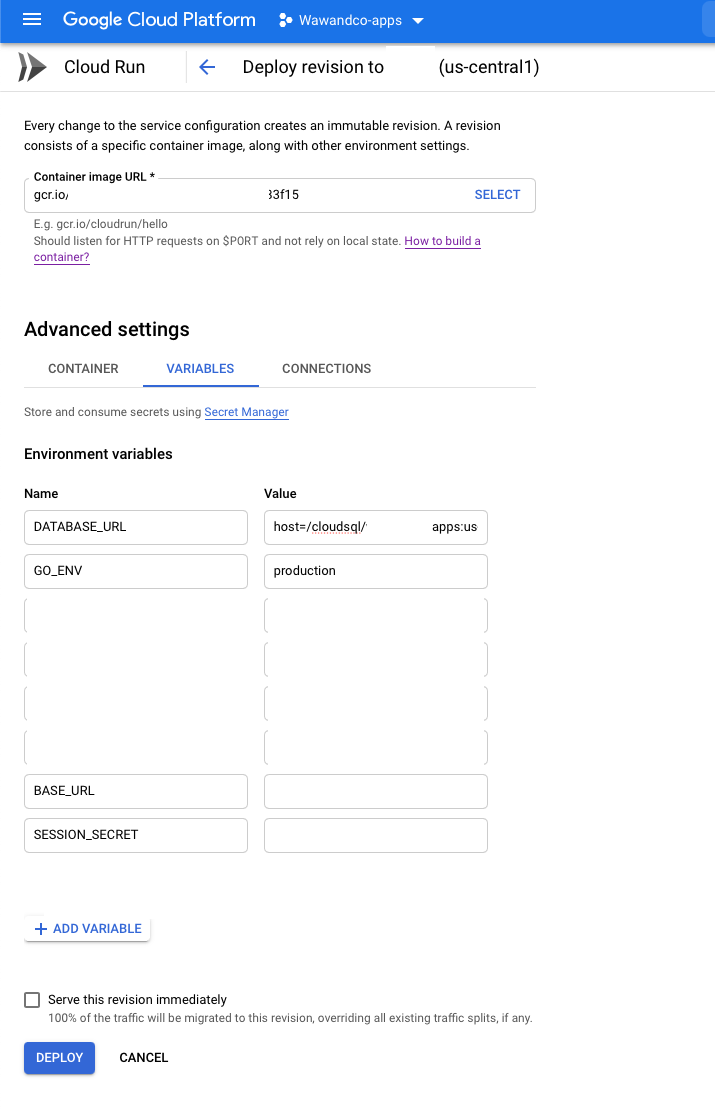
This one will allow to connect our application with the database we have been setting up across this post. We will take advantage of the connection we have created to access that database securely. To do so the DATABASE_URL should look something like:
host=/cloudsql/wawandco:us-central1:wawandco user=user password=long-secure-password dbname=database sslmode=disable
Where:
host value should use the same database we have created a connection for previously.user value is the username we created on the instance for this applicationpassword we created for that user.dbname is the name of the database we will be using (not the instance).This will set the max number of connections that a container will open to our database. This is important when running in production because the number of connections in our database are finite and we need to keep track of them.
Go env will tell our application to run in production mode, this mode is recommended for non-development purposes.
The SESSION_SECRET env variable is used to store our cookies securely. This one MUST be set in any Buffalo application running in production mode.
We will need to press the DEPLOY button once this is all set. That will deploy a new revision of your app that will be able to talk with the database instance you have created.
Thanks for reading until here! If you have questions or comments about this post, you can find me on twitter at @paganotoni, or find my company at @wawandco, I would love to hear your opinions on this and other posts.