Book a Free Call
No commitment required

SwiftUI, Apple’s modern UI framework, revolutionizes the way developers integrate and interact with the Calendar in iOS applications. It brings a new level of convenience and creativity, simplifying the implementation of features like setting reminders, organizing meetings, and synchronizing events across multiple devices. What makes SwiftUI stand out is its capacity to extend beyond basic calendar functionalities. It acts as a dynamic platform, enabling developers to craft unique and engaging user experiences.
This framework is not just about adapting to existing norms; it’s about reshaping them. Whether it’s refining the interface aesthetics or innovating interactive elements, SwiftUI provides developers with extensive creative control. This approach facilitates the creation of bespoke calendar experiences, tailored to the specific needs and preferences of users.
Our exploration delves into the essential techniques for integrating calendar functionality within SwiftUI applications. We aim to equip users with the tools to create and view events with ease, making the most of SwiftUI’s intuitive design capabilities. This guide is crafted to empower developers to leverage SwiftUI’s full potential, enhancing both the efficiency and the user experience of calendar management in iOS apps.
We do not necessarily have to build a view with all the required fields to create an event on the Calendar. Apple provides us with EventKit and EventKit UI frameworks, which allow us to use view controllers to interact with calendar and reminder information. To create events, we’ll utilize EKEventEditViewController.
The EKEventEditViewController is a view controller used to create, edit, and delete calendar events presented modally. These new events are added to the user’s default calendar. To call upon this controller, we must implement its interface, which is defined by the following methods:
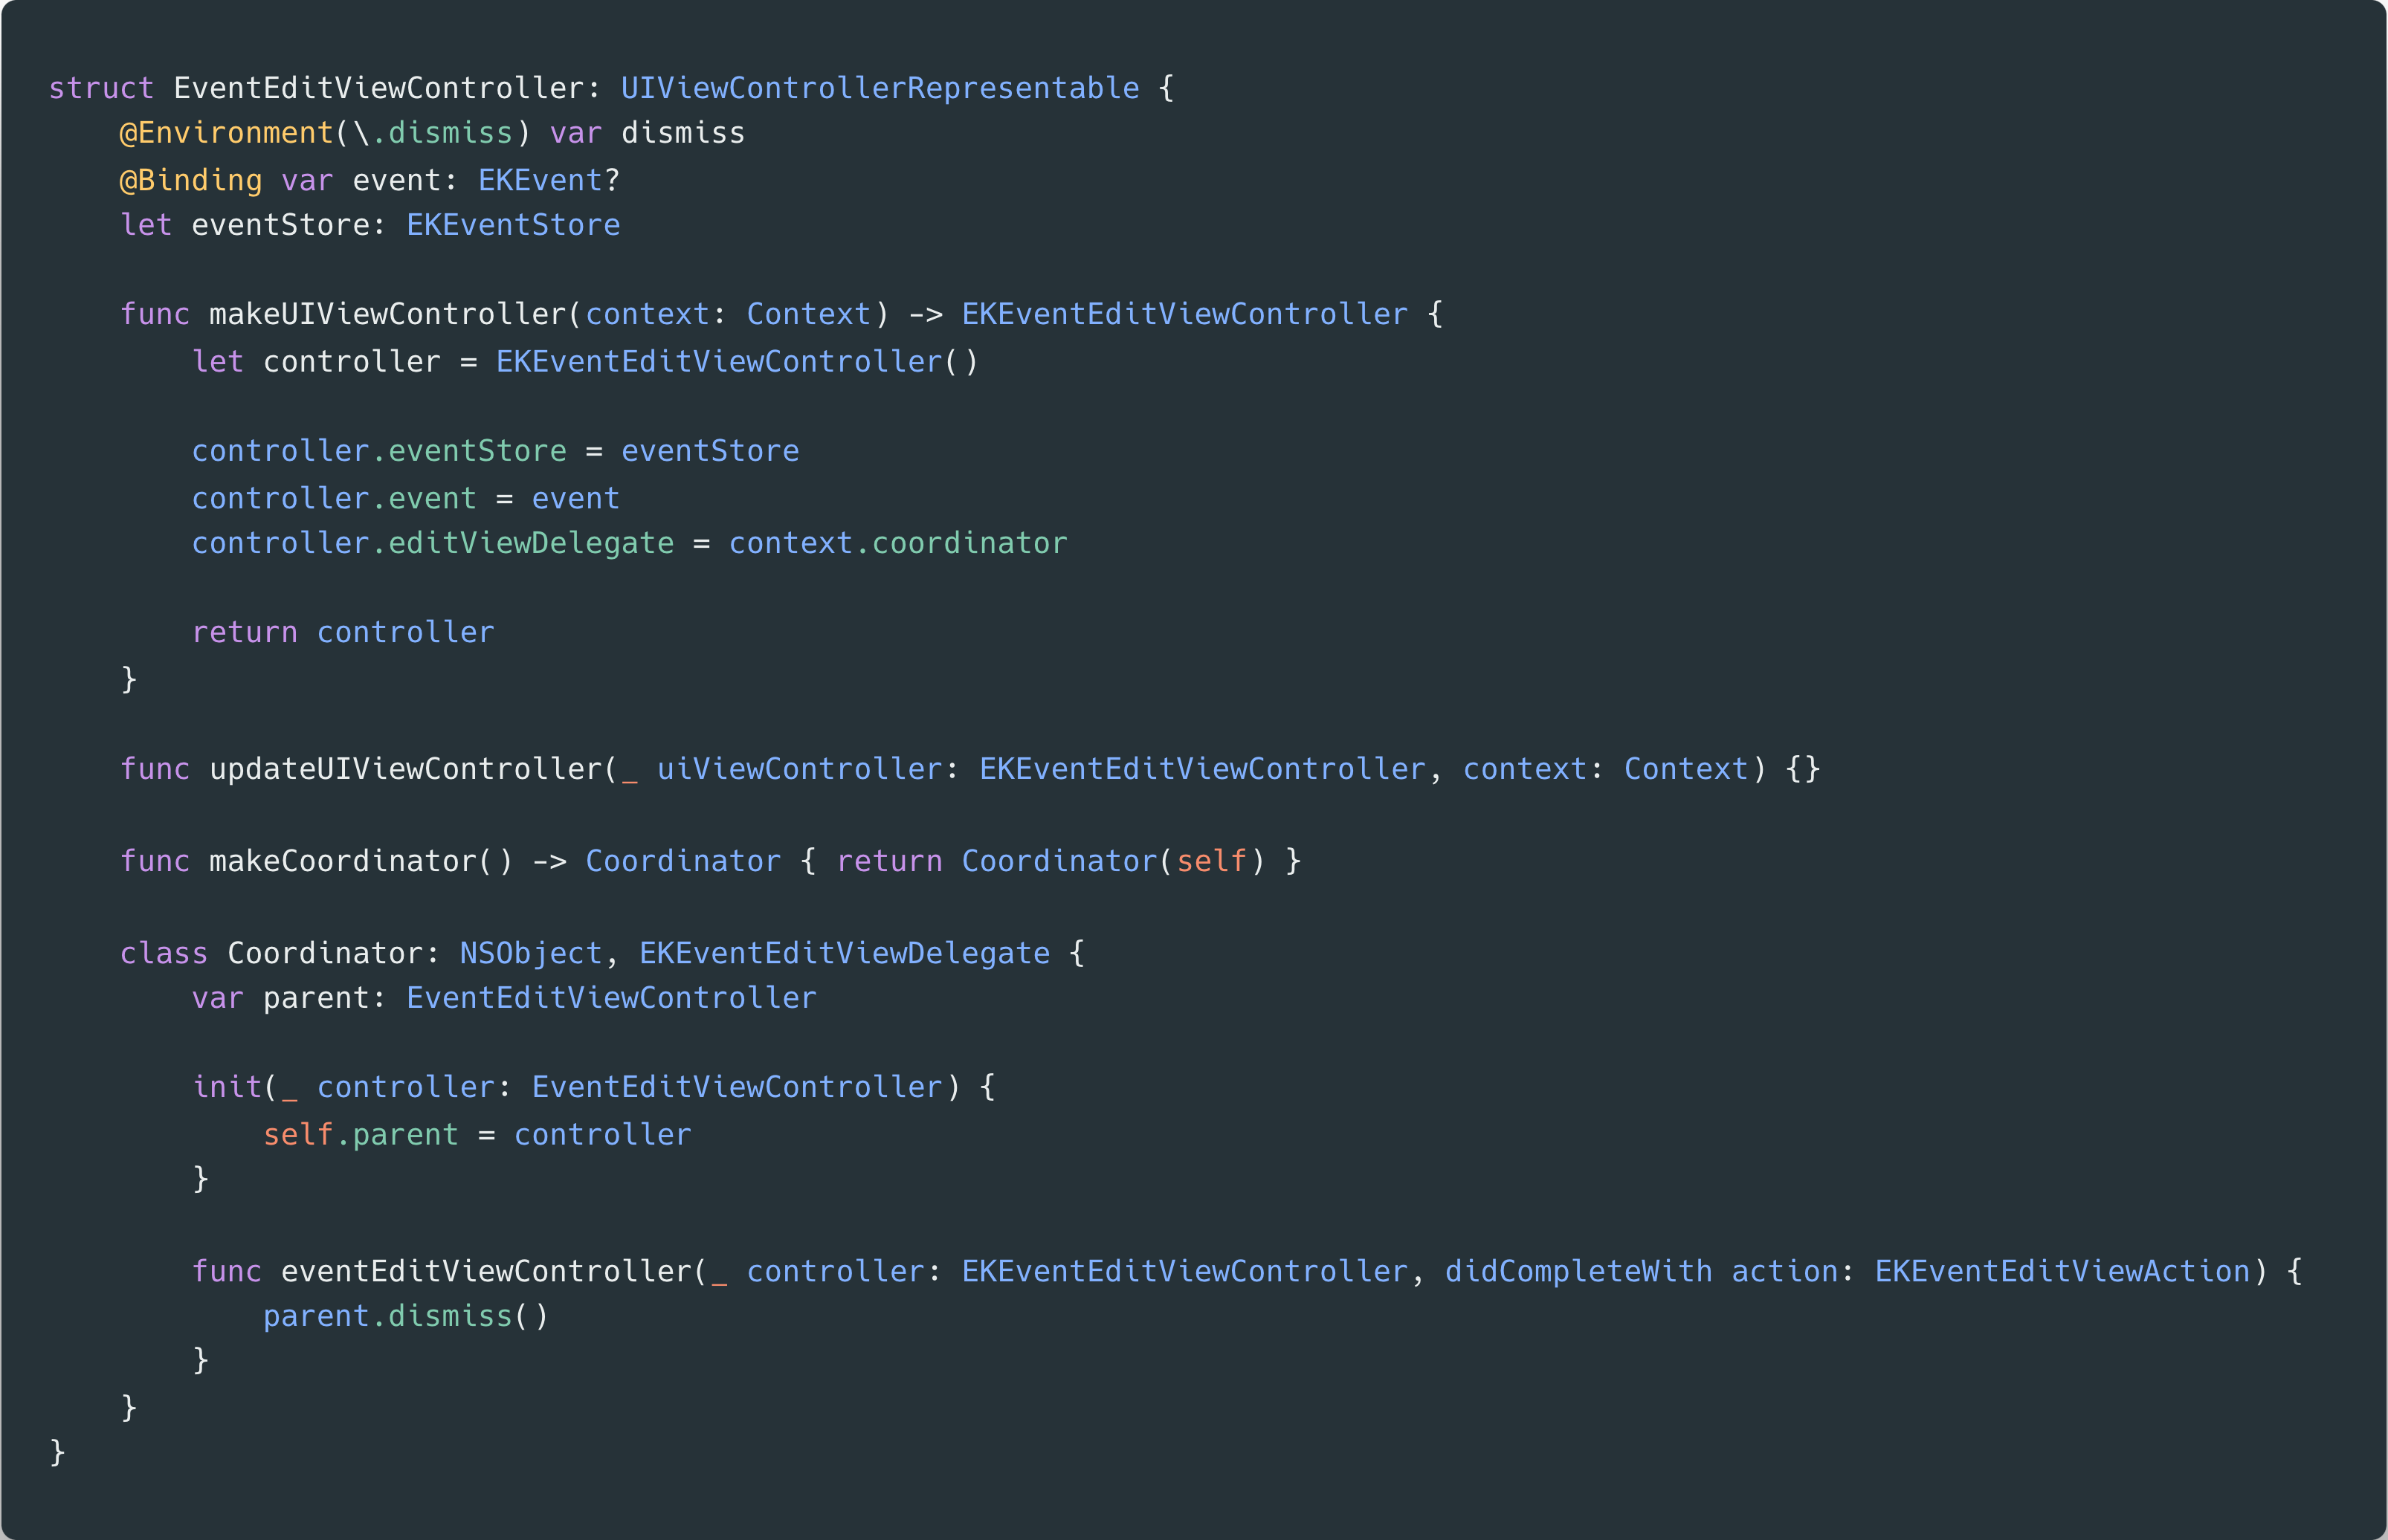
In makeUIViewController, we will declare the controller and assign values for the event to be created (EKEvent) and the event store used to save the event (EKEventStore). For creation purposes, we will simply add updateUIViewController to conform to the defined interface, without adding any logic. With makeCoordinator, we will return a coordinator, which will be used to communicate changes from your view controller to other parts of your SwiftUI interface. For instance, handling tasks such as dismissing the modal when an event is added or when event creation is canceled might be part of its responsibilities.
Once the event creation view controller is implemented, all we need to do is call it in the way we prefer. Since it is presented modally, we will call it using a sheet and add a button that triggers the display of this sheet.
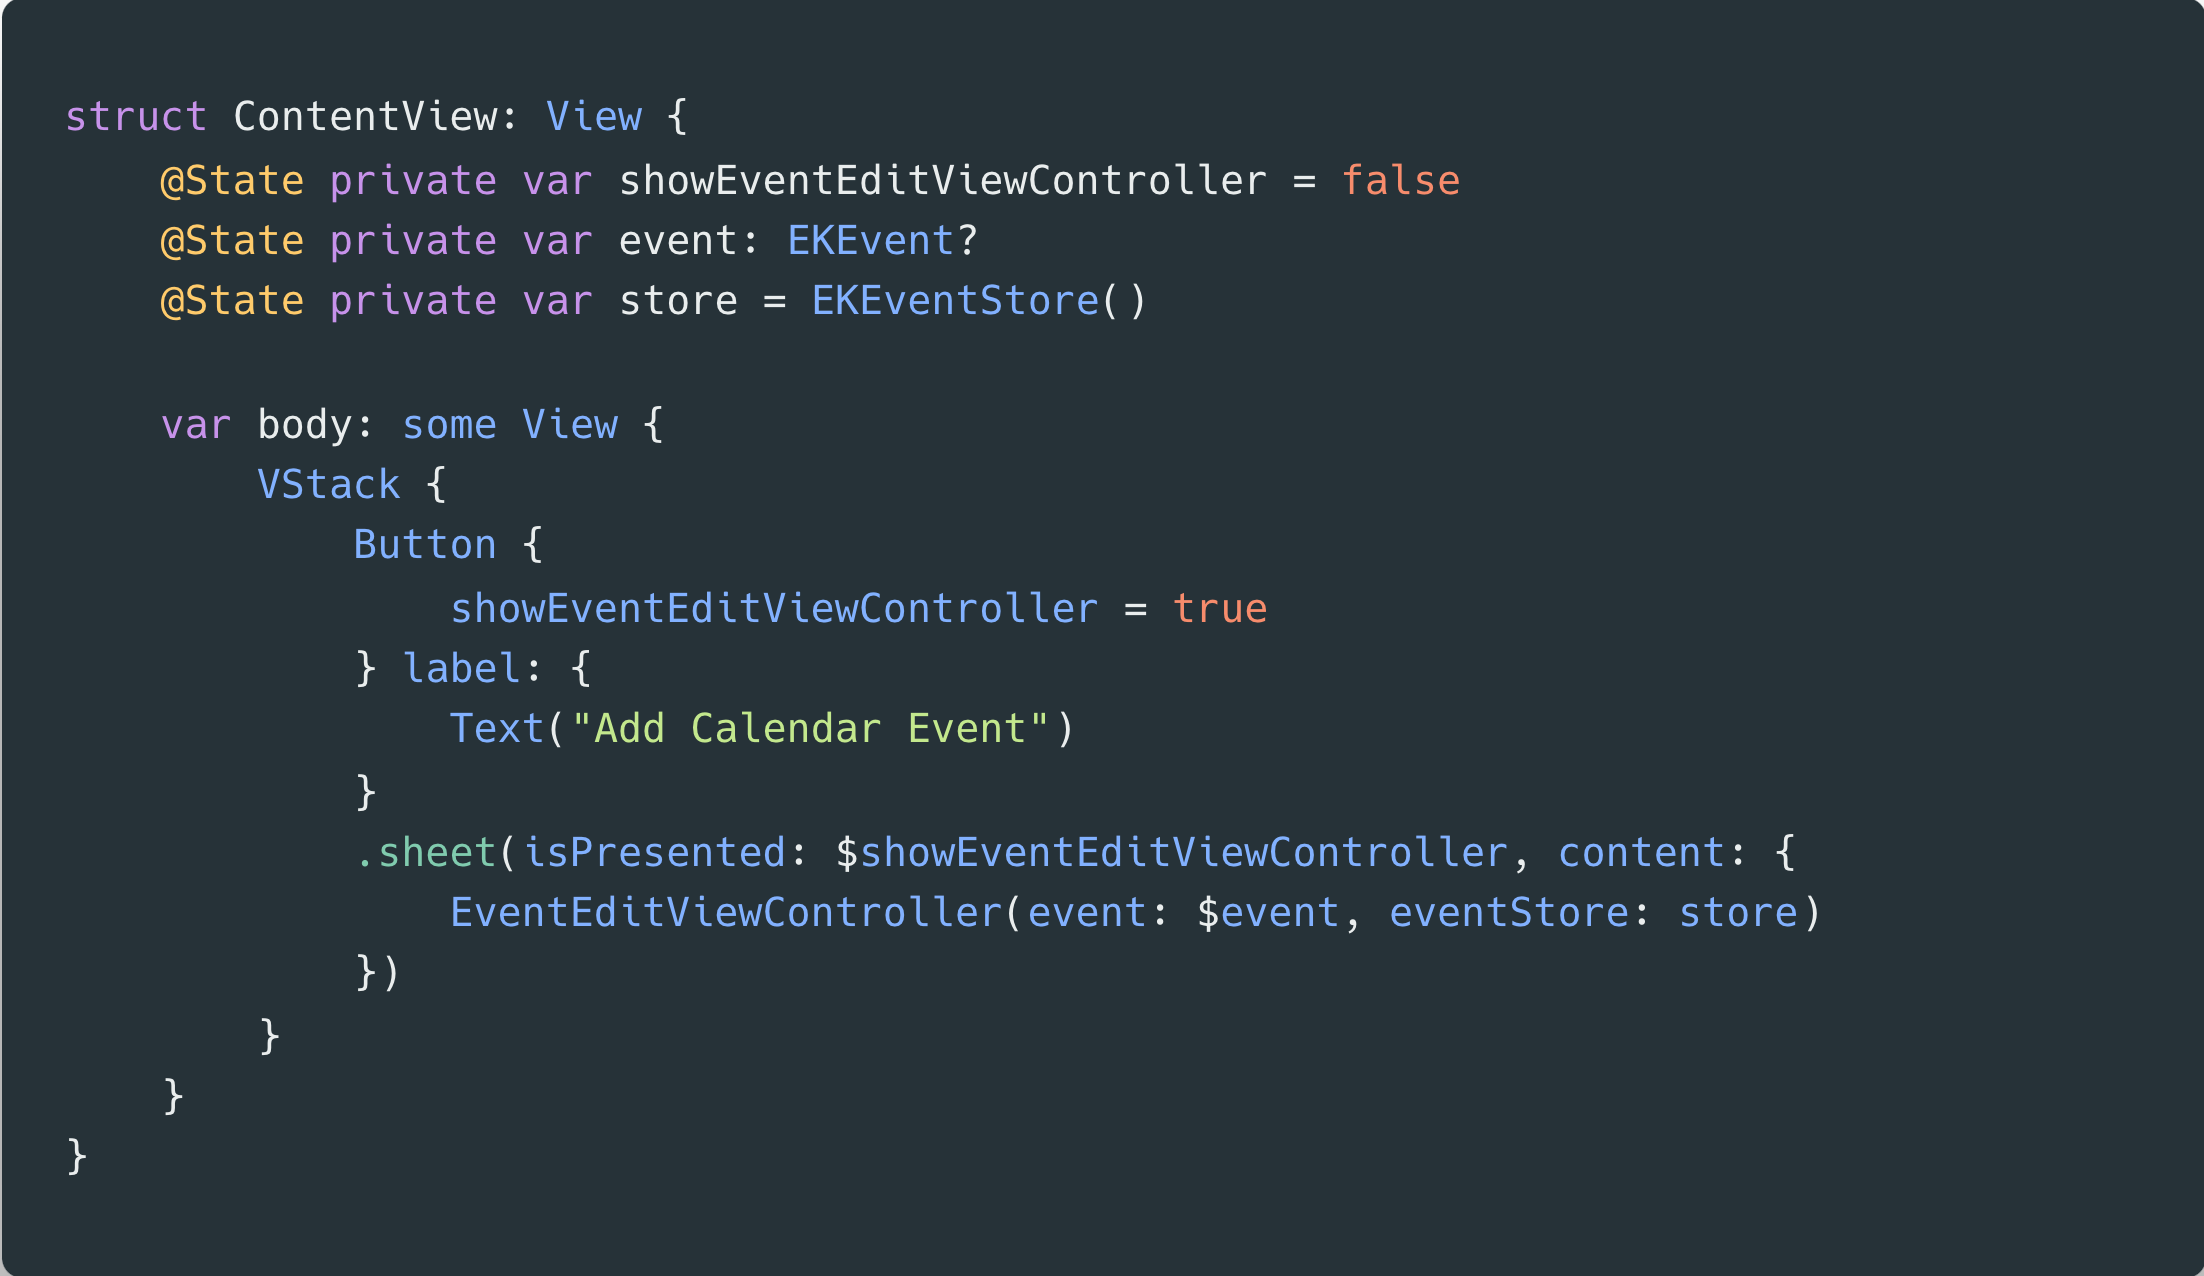
Here is how the two views of our SwiftUI application would look:

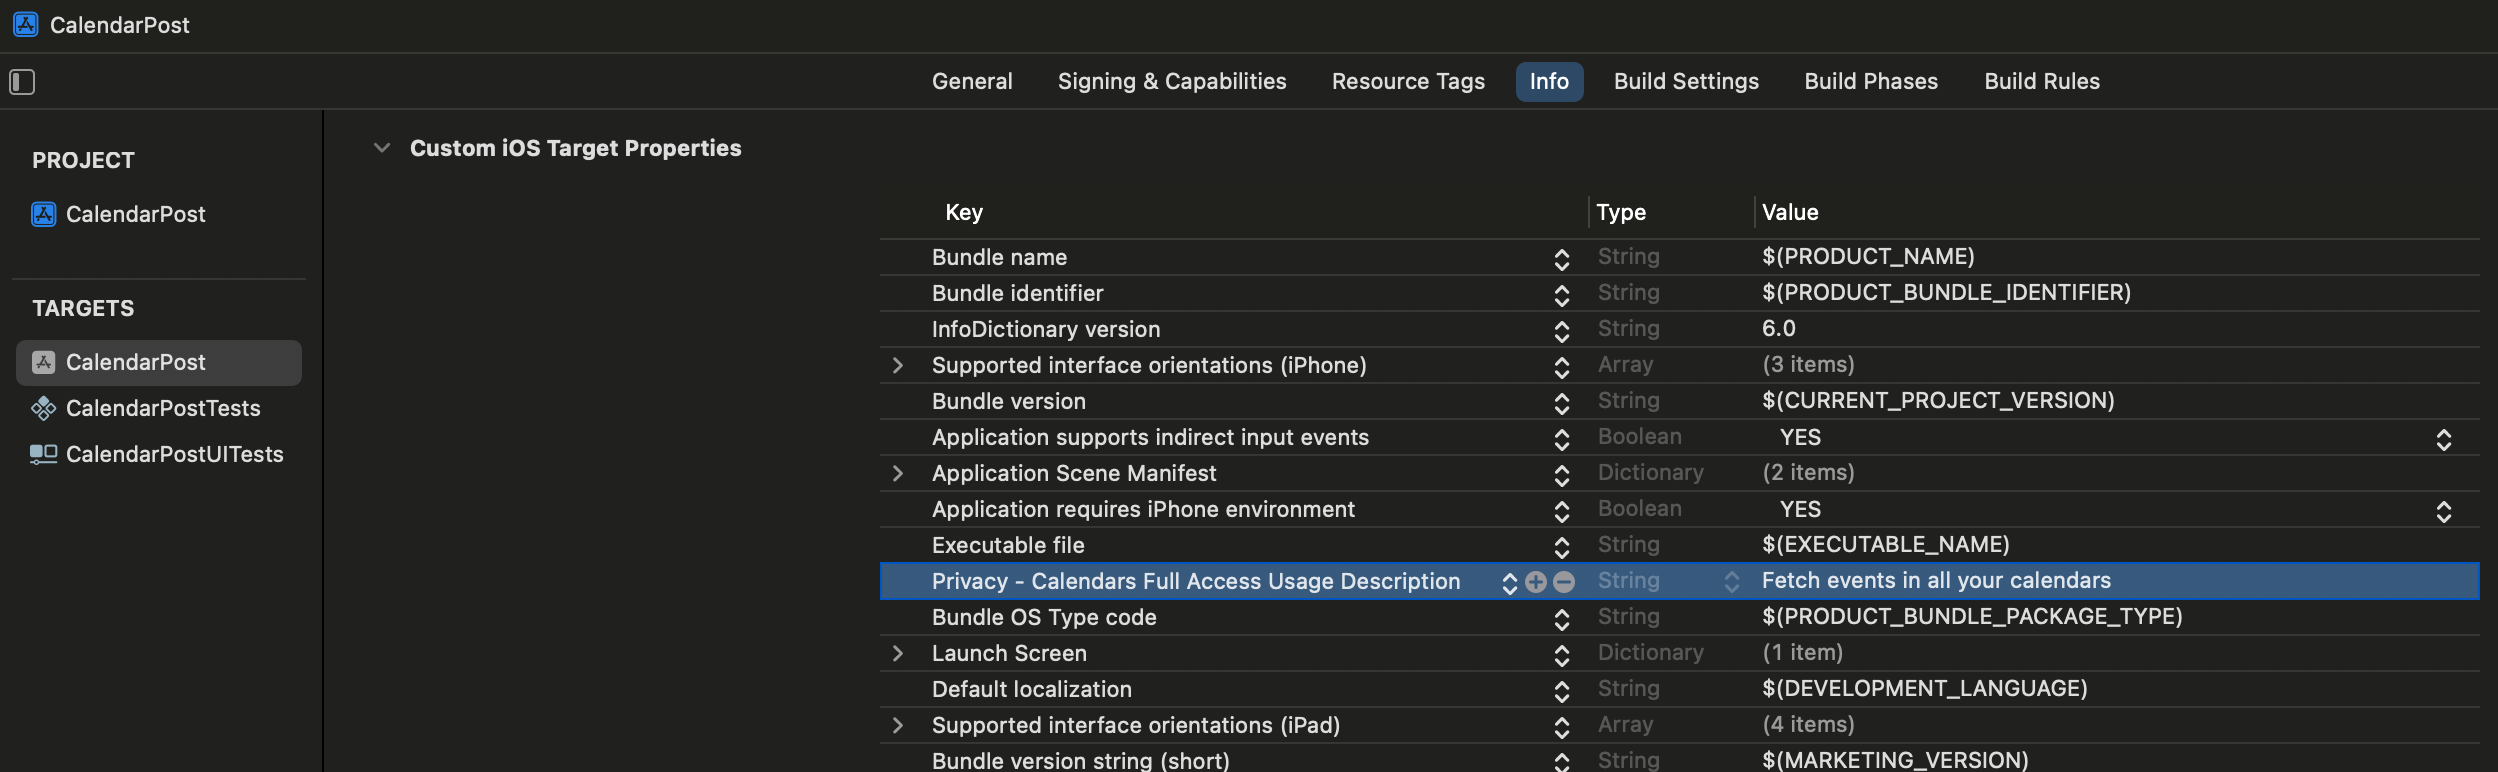
An aspect that distinguishes event creation from its reading is that the former can be done without requesting any calendar access. However, if our app needs to display, update, or delete events, we need to start by adding the necessary permission to access the calendar. This is achieved in Xcode by accessing the application’s target Information > Info > Custom iOS Target Properties and adding the permission NSCalendarsFullAccessUsageDescription along with a description explaining why we need that permission as shown in the following image:
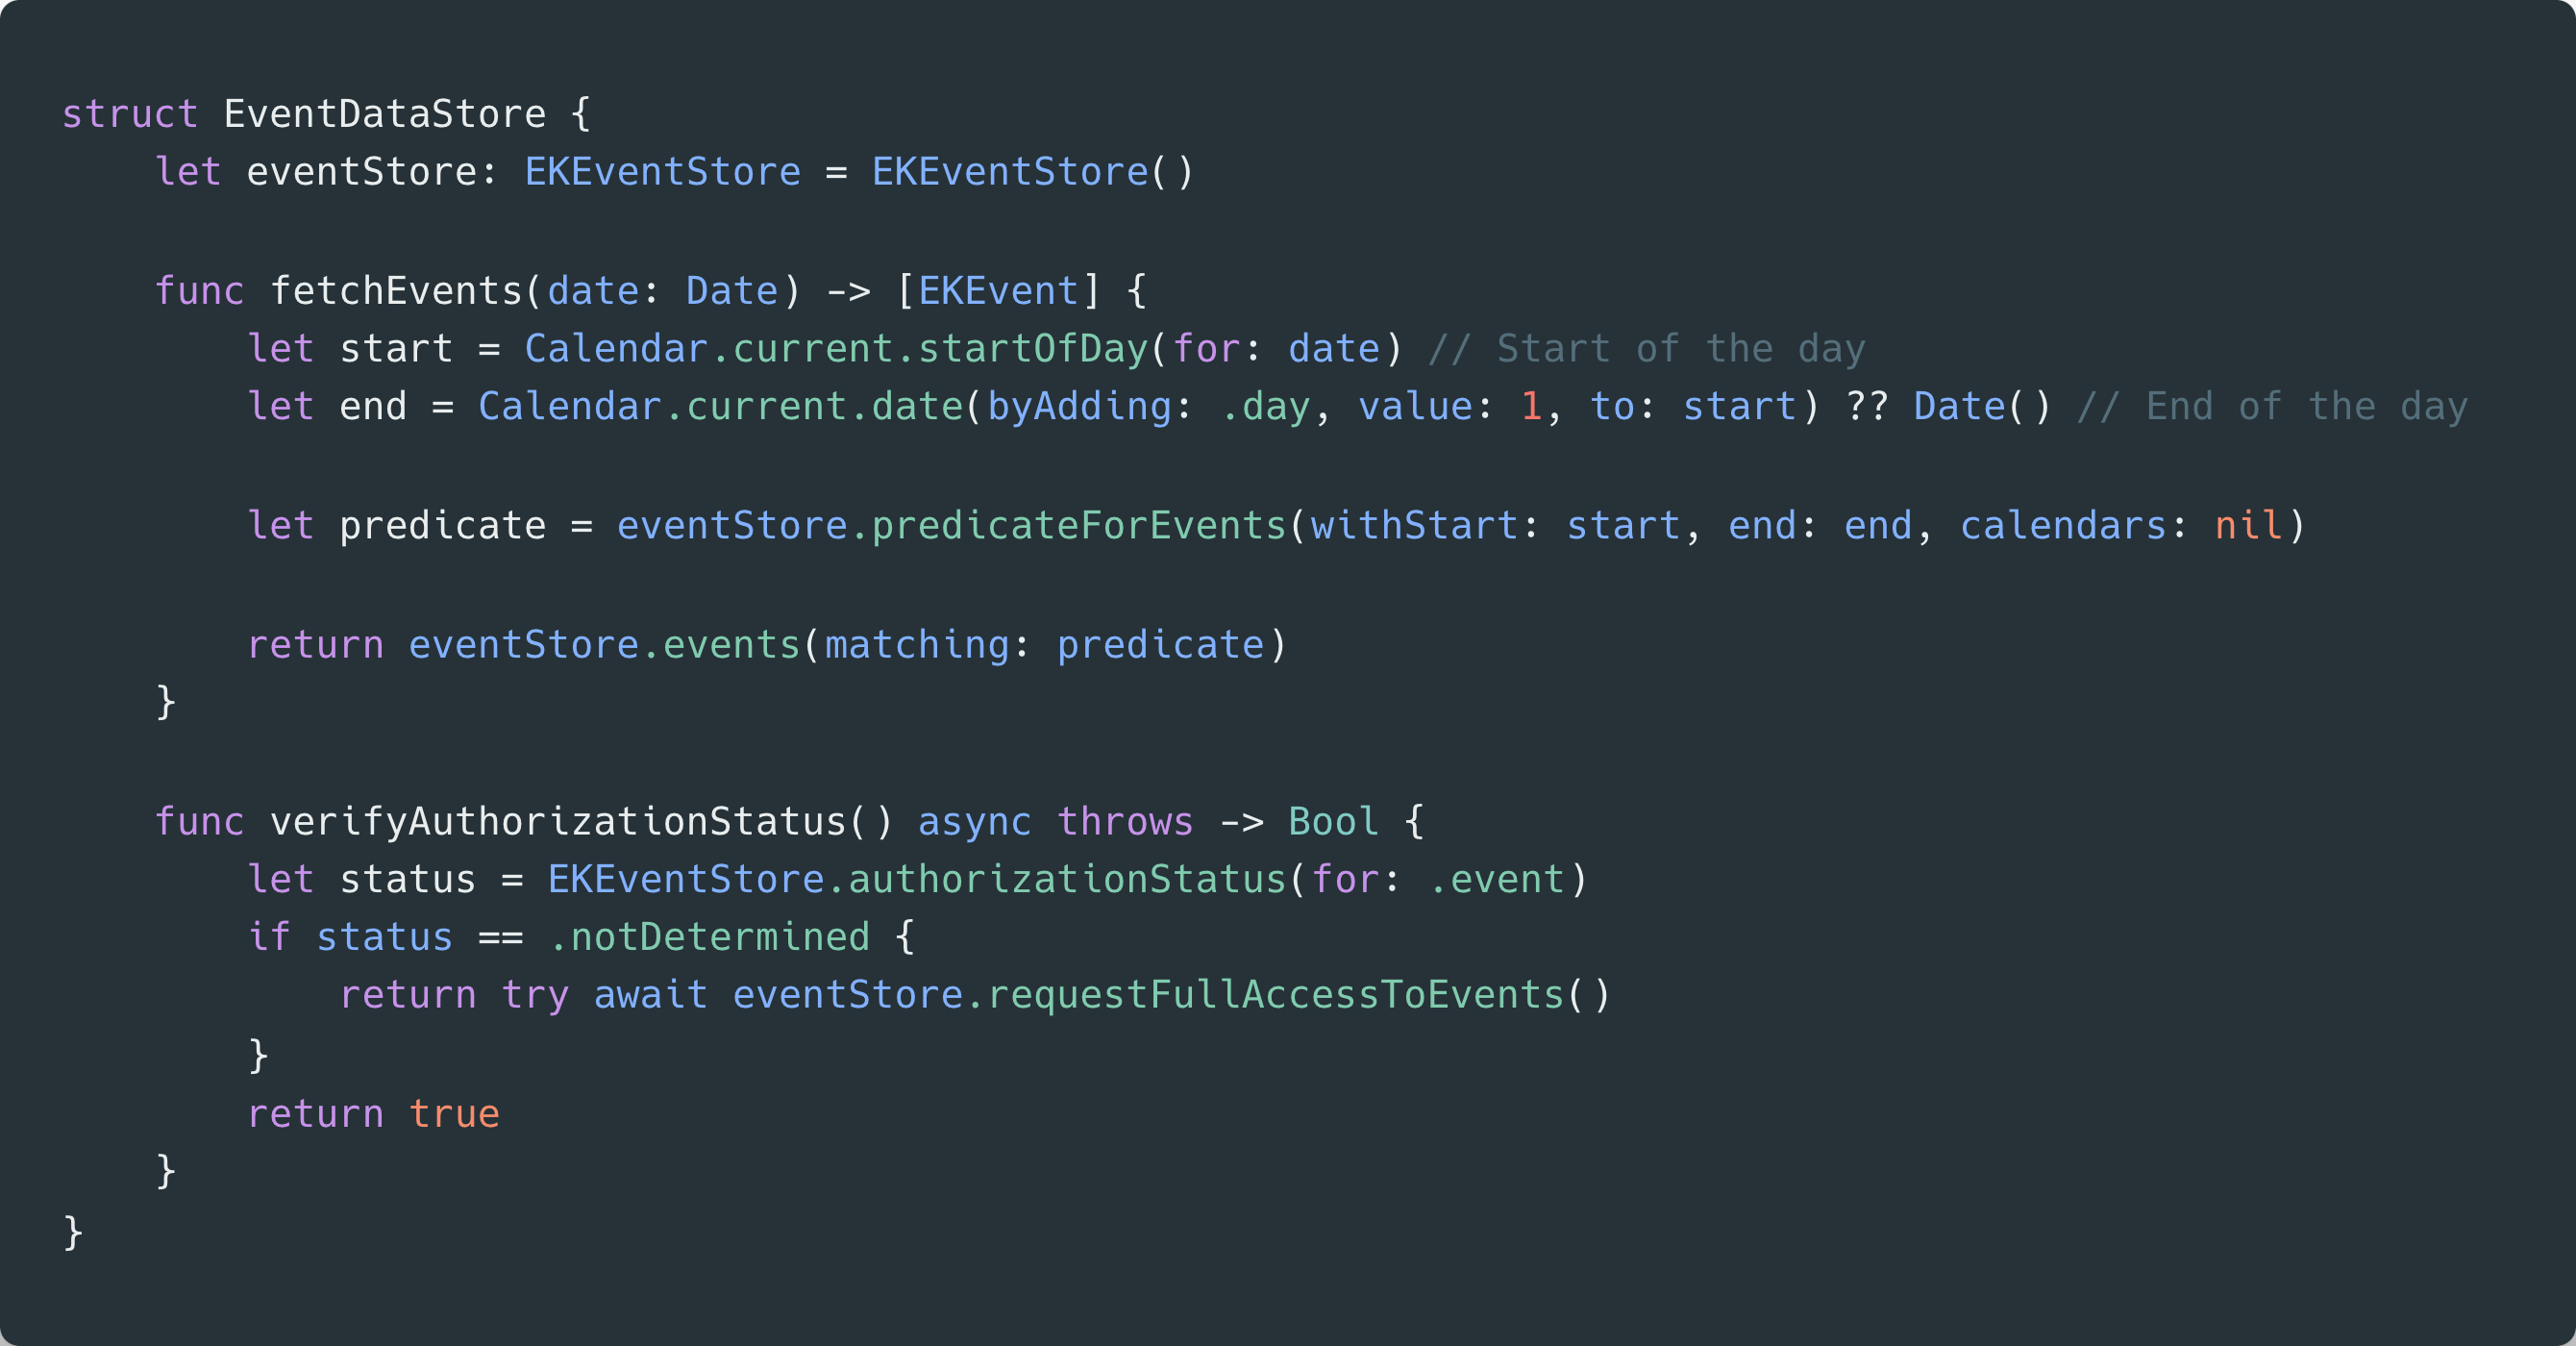
To fetch events and display them in our application, there’s a sequence of steps to follow. First, we have to create an event store, proceed to request full access permissions, then construct a predicate and finally fetch the events from the event store.
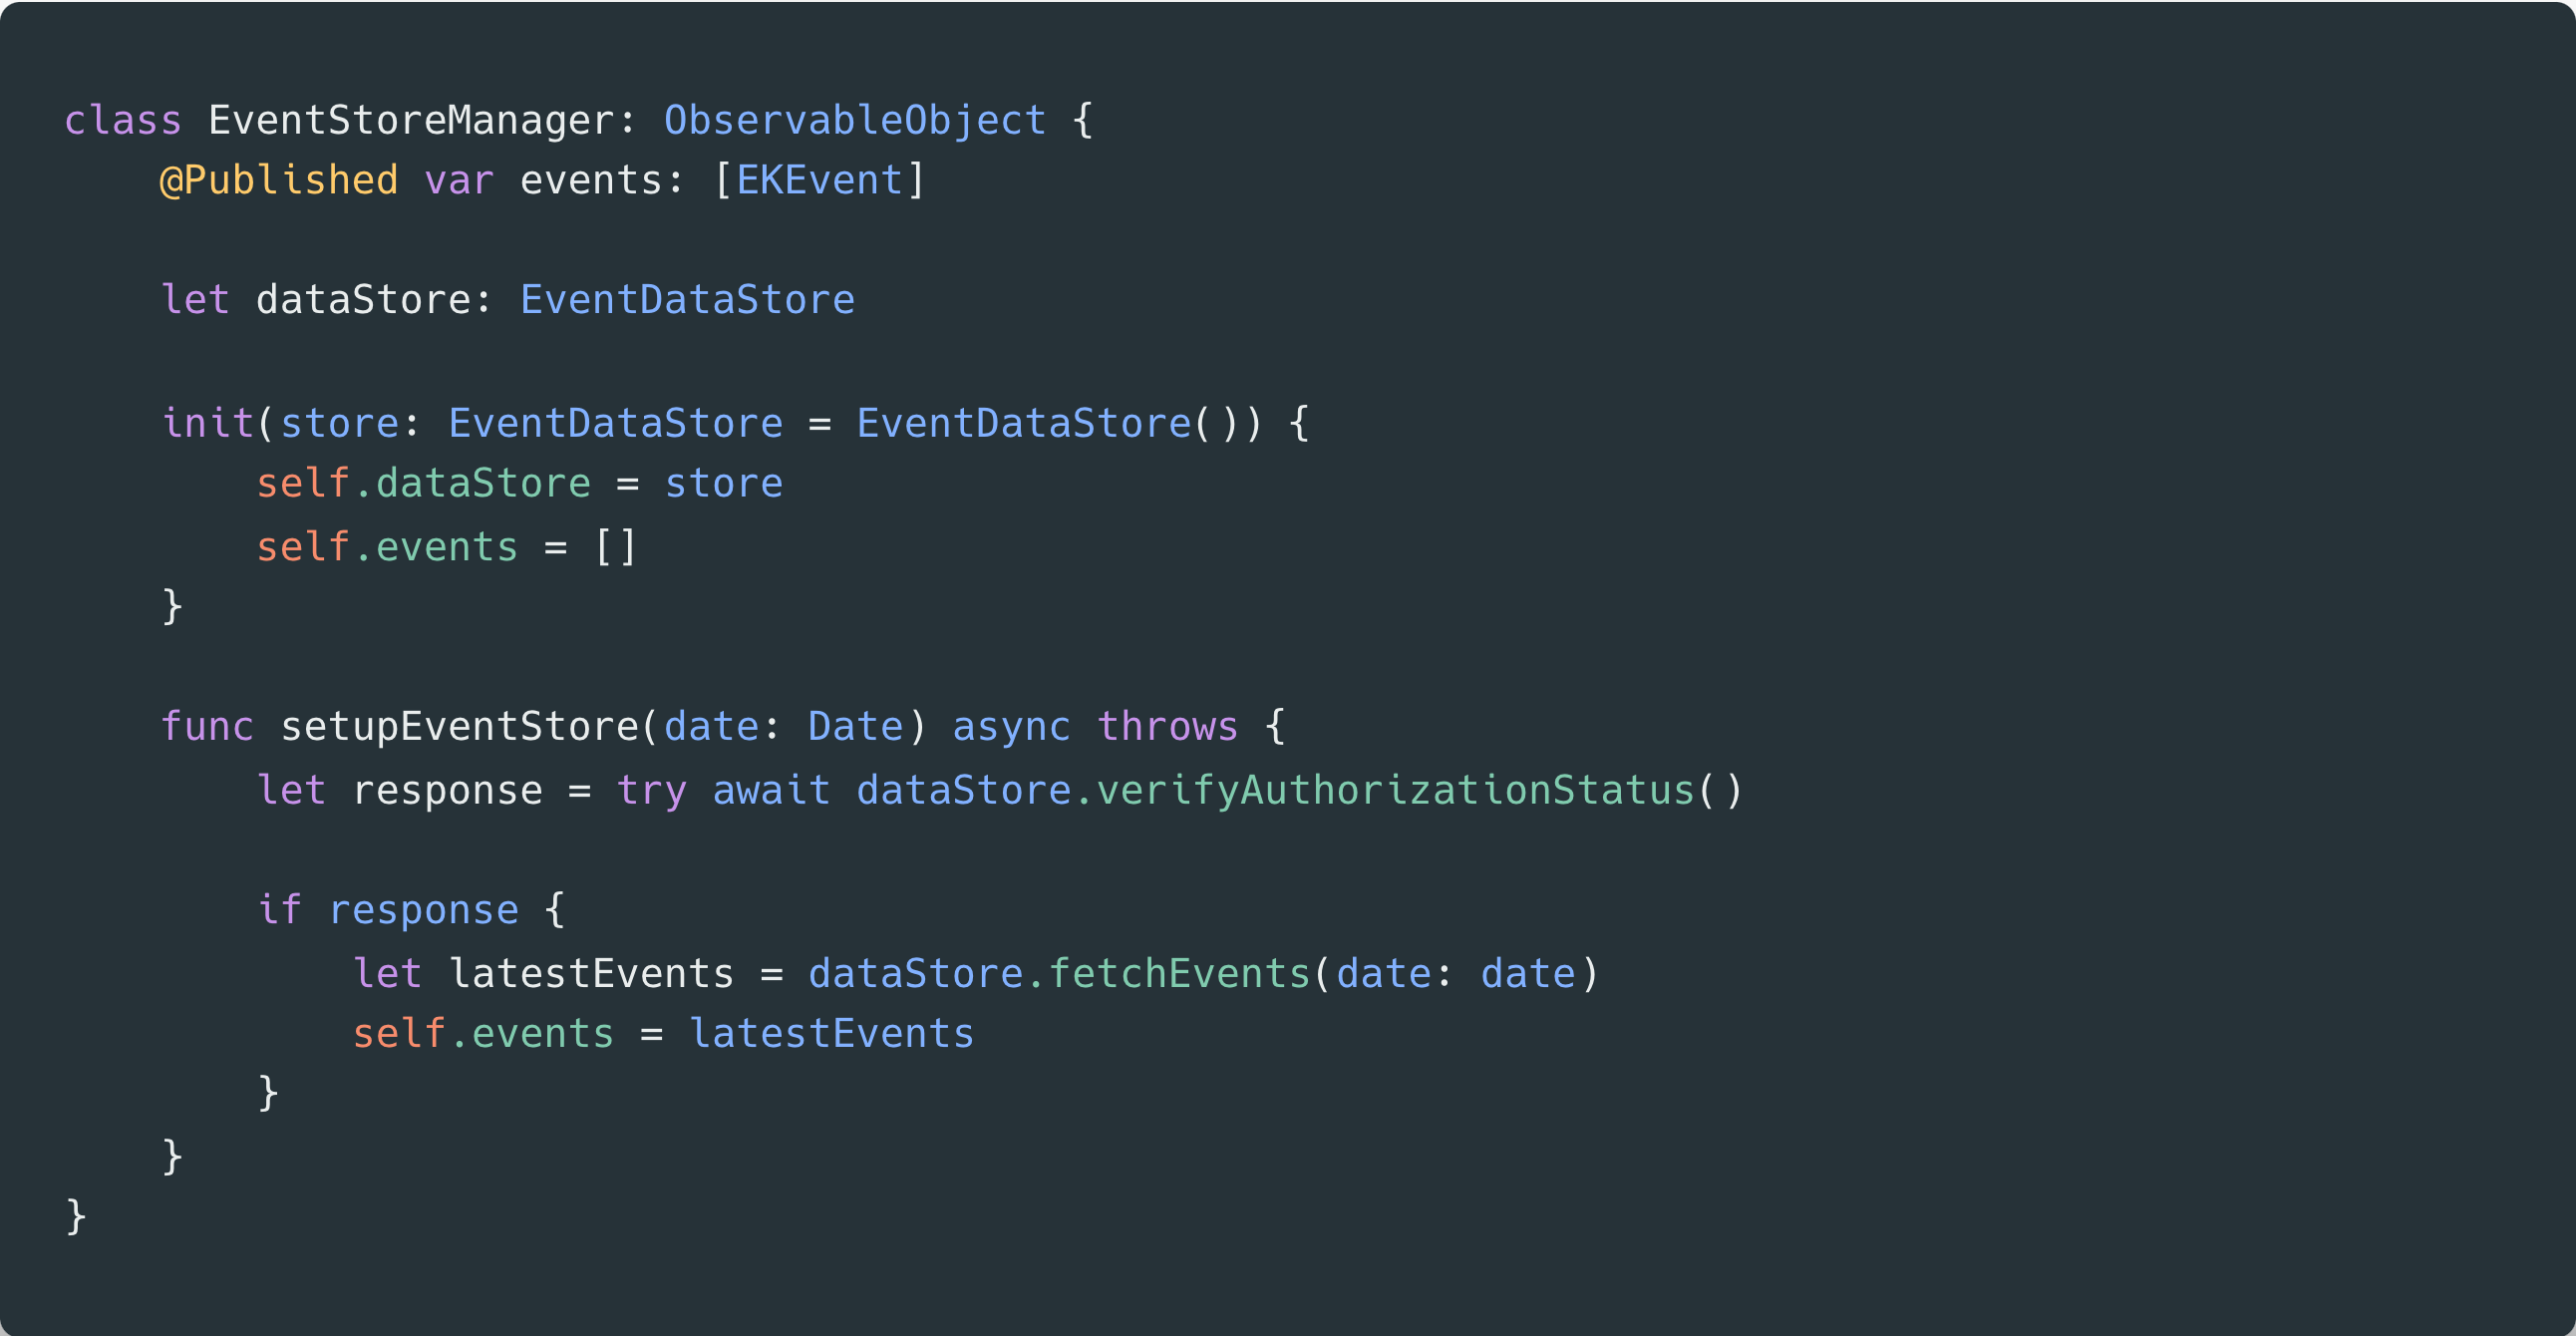
In the following snippet, what we are doing is creating the event store and defining a fetchEvents function responsible for creating the predicate. This predicate will search for all events from the beginning of the current day until the end of the day and return them. Additionally, we have created a verifyAuthorizationStatus function that checks if the application has full access to fetch events.
Here, we build our Event Store Manager, who will be the liaison for our SwiftUI View. Through the setupEventStore function will we call the two previously created functions: one to verify access and the other to fetch our events.
Finally, within our SwiftUI View, we initiate an asynchronous task to perform the event search before the view appears. We add a list where we iterate through our events, displaying their title, start date, and end date.

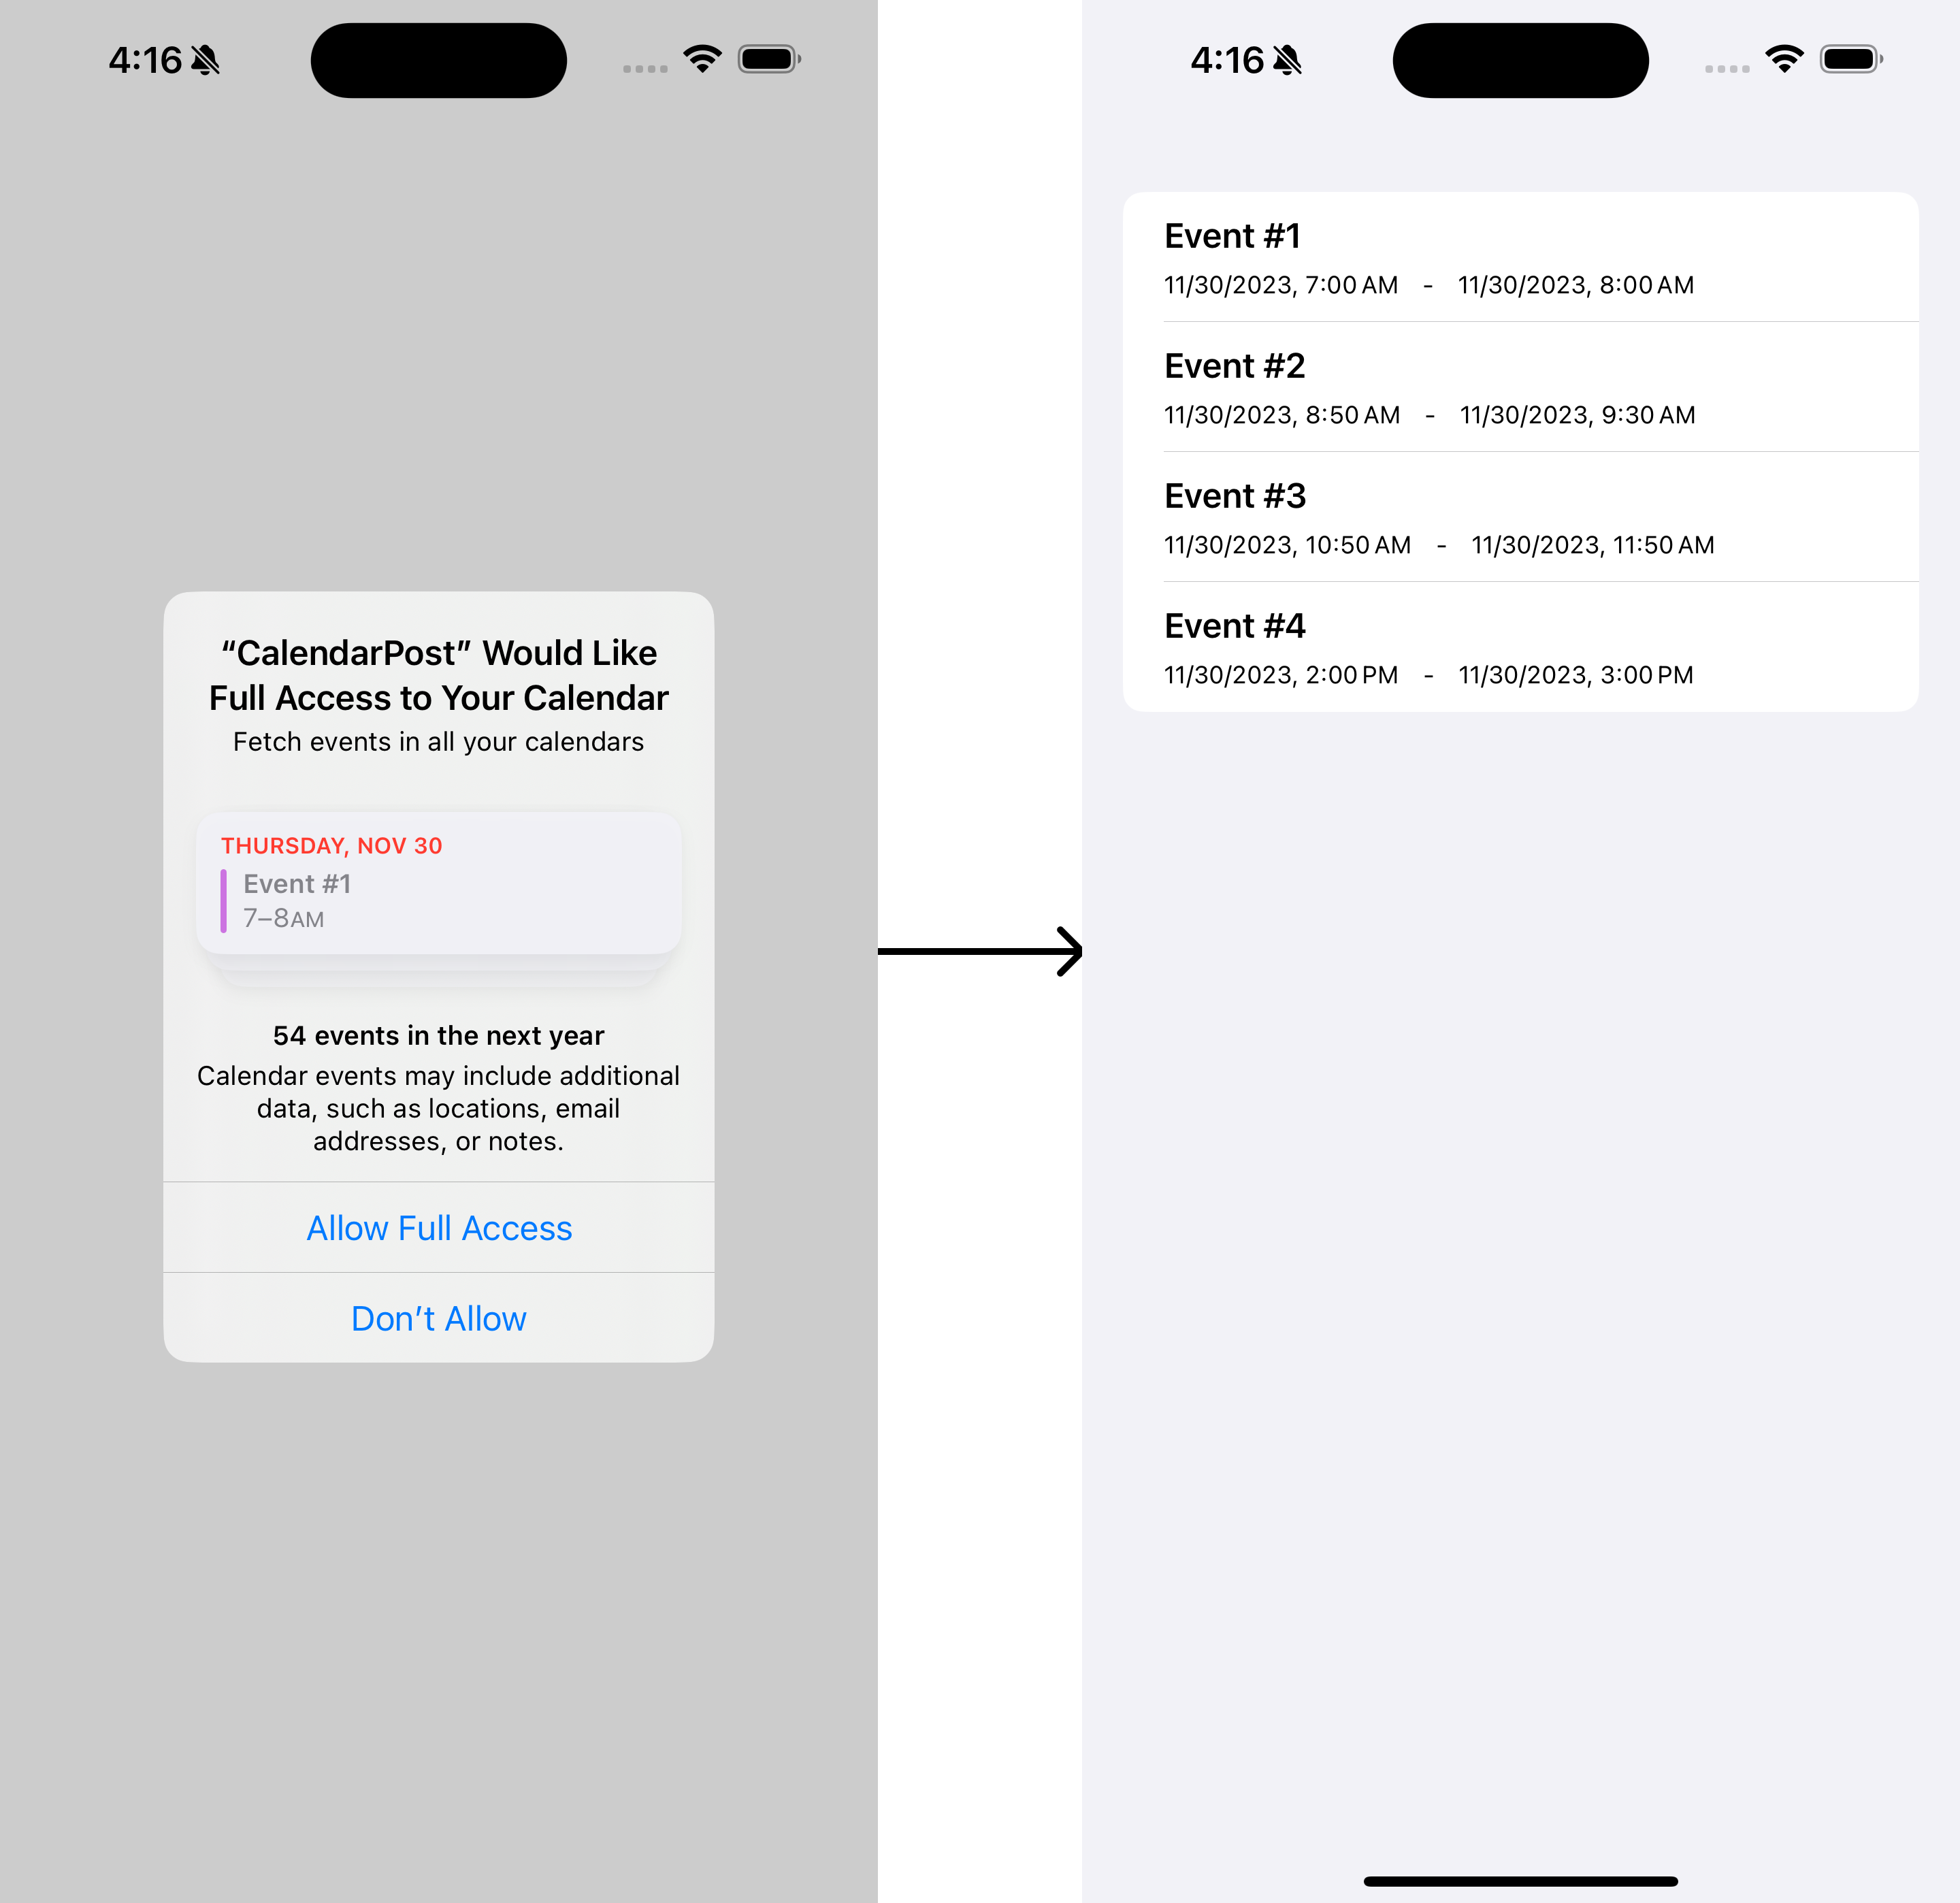
Once we launch our application, the first prompt we encounter is a system message requesting full access to the calendar, as shown in the initial screenshot. Clicking on Don’t Allow button will result in a blank screen because our application will not have any events to display. Pressing the Allow Full Access button grants us the ability to view events for the current day, as demonstrated in the second screenshot.
With just a few lines of code, we were able to create an application that adds events to our calendar. However, there’s so much more we can do beyond mere creation. We can also design our own form, including only the necessary fields to create events aligned with our application’s specific purpose. We can even leverage Siri suggestions to create events, making life easier for our users.
Regarding event fetching, we have noticed that managing this data is more comprehensive, and as it involves sensitive information, permissions are required. Therefore, we advise to only add this feature to your applications in cases where it’s essential.