Book a Free Call
No commitment required

In our previous blog post, we discussed about Leveraging Fly Volumes to Transition from PostgreSQL to SQLite. While we covered the transition process, there is still an important aspect we haven’t addressed: how to handle backups and queries. This is where LiteFS and LiteFS Cloud come into play.
In this post, we will walk you through the series of steps we took to integrate LiteFS and LiteFS Cloud into our application. By following these steps, you will be able to replicate our experience and enjoy the benefits of these tools in your own projects.
Previously, we decided to move migrate our database from PostgreSQL to SQLite for the sake of simplicity and efficiency. For that matter, we utilized Fly Volumes to save our SQLite database in the local persistent storage of our Fly machine. At this point, we have an application running on Fly.io with a Fly volume attached to it, and now we’ll be adding LiteFS to handle our migrated database and back it up as needed.
LiteFS is a distributed file system that transparently replicates SQLite databases. You can run your application like it’s running against a local on-disk SQLite database but behind the scenes the database is replicated to all the nodes in your cluster[1].
LiteFS Cloud is a Fly.io product which provides backups and recovery for your LiteFS SQLite database. With LiteFS Cloud, you’ll have the ability to restore your LiteFS database to any point in time from the last 30 days, near instantaneously[2].
Together, LiteFS and LiteFS Cloud offer a robust and user-friendly way to manage your database. By integrating LiteFS and LiteFS Cloud into our application, we were able to address the backup and query needs that were not covered by the transition to SQLite.
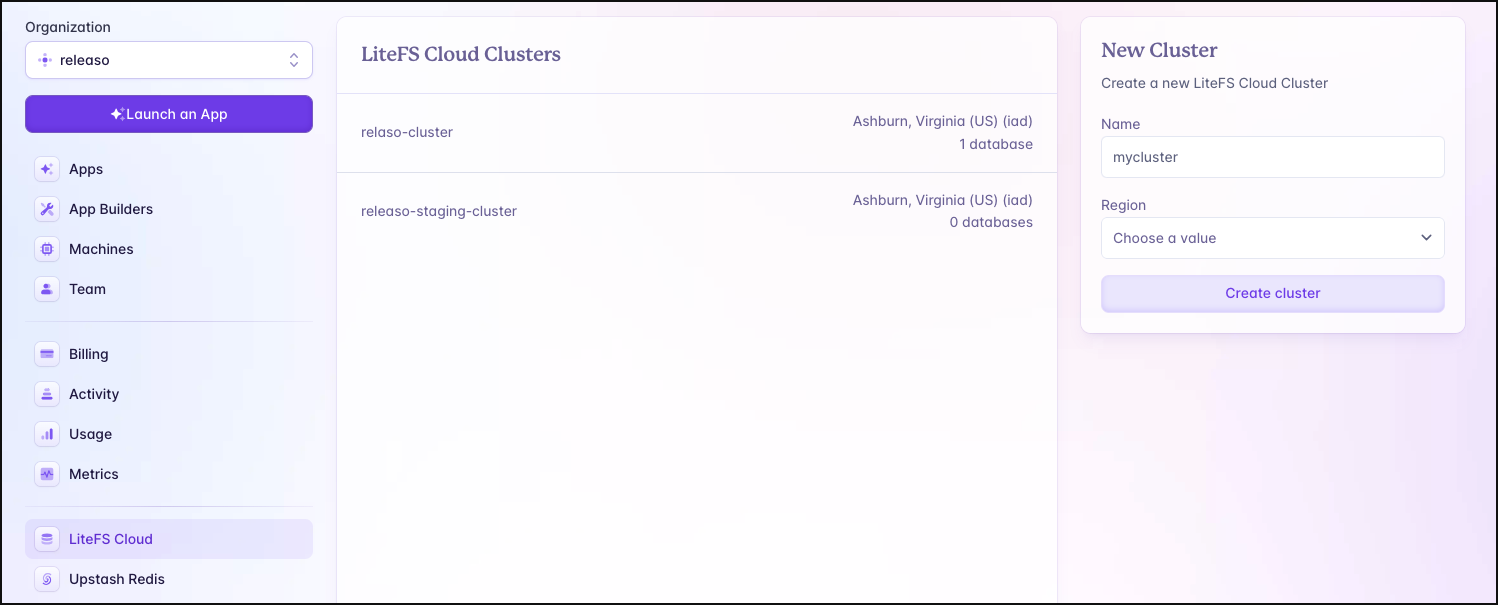
We began by creating a LiteFS cluster to wire up the automatic backups for our database. Creating it is straightforward, just go to your Fly Dashboard, locate the LiteFS Cloud section on the left navbar and hit the create button to finish that process. Here’s a screenshot for the sake of simplicity:
Once you have created a LiteFS Cloud cluster in the Fly.io dashboard, it is essential to copy the token provided by the dashboard. This token will be required later on.
With that covered, we can now move into the installation and configuration of LiteFS.
To include LiteFS in our container, we added these lines to our Dockerfile.
RUN apk add --no-cache ca-certificates fuse3 sqlite

# Copying litefs
COPY --from=flyio/litefs:0.5 /usr/local/bin/litefs /usr/local/bin/litefs
Let’s break down the changes:
RUN apk add --no-cache ca-certificates fuse3 sqlite: This installs the necessary dependencies for LiteFS, including the fuse3 library, ca-certificates, and SQLite.
COPY --from=flyio/litefs:0.5 /usr/local/bin/litefs /usr/local/bin/litefs: This copies the LiteFS binary into the container, allowing us to run it alongside the application.
After copying the LiteFS binary and installing the necessary dependencies, the next step was to configure LiteFS for the project.
We needed to create a file named litefs.yml in the root of the project and add the following configuration:
# This directory is where our application will access the database.
fuse:
  dir: "/releaso_volume"

# This directory is where LiteFS will store internal data.
# You must place this directory on a persistent volume.
data:
  dir: "/data/db"
In the configuration:
fuse: dir: "/releaso_volume": Specifies the directory where the application will access the database.
data: dir: "/data/db": Indicates the directory where LiteFS will store its internal data. Ensure that this directory is placed on the persistent volume we created before and specified in the fly.toml file.
LiteFS only allows a single node to be the primary at any given time. The primary node is the only one that can write data to the database. The other nodes are called replicas and they provide a read-only copy[3].
lease:
  # For dynamic clusters, use the "consul".
  # This allows the primary to change automatically when
  # the current primary goes down. For a simpler setup, use
  # "static" which assigns a single node to be the primary and does
  # not failover.
  type: "static"

  # Specifies if this node can become primary. The expression below evaluates
  # to true on nodes that are run in the primary region. Nodes in other regions
  # act as non-candidate, read-only replicas.
  candidate: ${FLY_REGION == PRIMARY_REGION}

  # If true, then the node will automatically become primary after it has
  # connected with the cluster and sync'd up. This makes it easier to run
  # migrations on start up.
  promote: true

  # The API URL that other nodes will use to connect to this node.
  advertise-url: "http://${FLY_ALLOC_ID}.vm.${FLY_APP_NAME}.internal:20202"
In this configuration, we’re using a static leasing, which assigns a single node to be the primary and does not failover. The candidate expression ensures that only nodes in the primary region can become primary, while the promote option allows the node to automatically become primary after connecting with the cluster.
If you do not wish to run a separate
Consulinstance and you can tolerate downtime of your primary node, you can run LiteFS with a static lease. A static lease means that only a single, fixed node will ever be the primary[4].
We needed to add to the fly secrets the token we got when creating the LiteFS cluster, for that matter, we employed the following command:
$ fly secrets set LITEFS_CLOUD_TOKEN=$(litefs cloud auth token) -a app_name
This sets the API authorization token for LiteFS Cloud, which is used when generating backups.
LiteFS requires that all write operations occur on the primary node. This means that our application needs to redirect write requests to the current primary node. Here’s how we configured it:
proxy:
  # Bind address for the proxy to listen on.
  addr: ":8080"

  # Hostport of the application - replace 3000 with whatever port
  # the application is listening on!
  target: "localhost:3000"

  # Filename of the SQLite database you want to use for TXID tracking.
  db: "releaso.db"
A TXID or Transaction ID is a string of letters and numbers that identifies a specific transaction on the blockchain. It can be used to look up a transaction on a node[5]
This proxy configuration ensures that the application’s write requests are directed to the primary node. LiteFS can also act as a supervisor process for the application. This allows LiteFS to wait until it has connected to the cluster before starting the application. Here’s how we set it:
exec:
  # Only run migrations on candidate nodes.
  - cmd: "/bin/db migrate"
    if-candidate: true

  # Then run the application server on all nodes.
  - cmd: "/bin/app"
In this configuration, LiteFS will only run the database migrations on the primary (candidate) node, and then start the application server on all nodes. Now, to ensure that LiteFS can find the configuration file, we needed to have it in our container, hence, we copied it into our docker image. Here’s what our Dockerfile ended up looking like:
FROM golang:1.22-alpine as builder
RUN apk --update add build-base curl

WORKDIR /src/app
ADD go.mod .
RUN go mod download

ADD . .

RUN go build -o bin/db ./cmd/db
RUN go run ./cmd/build
RUN go build -o bin/tasks ./cmd/tasks

FROM alpine
RUN apk add --no-cache ca-certificates fuse3 sqlite

WORKDIR /bin/

# Copying litefs
COPY --from=flyio/litefs:0.5 /usr/local/bin/litefs /usr/local/bin/litefs

# Copying binaries
COPY --from=builder /src/app/bin/app .
COPY --from=builder /src/app/bin/db .
COPY --from=builder /src/app/bin/tasks .

COPY ./litefs.yml /etc/litefs.yml

ENTRYPOINT litefs mount
The main command used to start LiteFS is the litefs mount command. This mounts a FUSE file system and then starts an API server for LiteFS nodes to communicate with each other.
Filesystem in Userspace (FUSE) is a software interface for Unix and Unix-like computer operating systems that lets non-privileged users create their file systems without editing kernel code[4].
At this point are configurations should be settled, now let’s take a look at what happened as we deployed our application.
After completing the configurations, we were able to deploy the application by running the following command:
$ fly deploy -a app_name --config fly.toml
This command will initiate the deployment process and ensure that the application, now integrated with LiteFS, is up and running on the Fly.io platform.
`
mia [info] config file read from /etc/litefs.yml

mia [info] LiteFS v0.5.11, commit=63eab529dc3353e8d159e097ffc4caa7badb8cb3

mia [info] level=INFO msg="host environment detected" type=fly.io

mia [info] level=INFO msg="litefs cloud backup client configured: https://litefs.fly.io"
We noticed that the LiteFS service was successfully integrated with LiteFS Cloud when we saw the message litefs cloud backup client configured: https://litefs.fly.io. This message indicates that the LiteFS service has been configured to use LiteFS Cloud for backup and retrieval of files.
## sets cluster id
mia [info] level=INFO msg="using existing cluster id: xxxxx
mia [info] level=INFO msg="set cluster id on \"static\" lease xxxxx
mia [info] level=INFO msg="begin primary backup stream: url=https://litefs.fly.io"

## mounts litefs to the volume
mia [info] level=INFO msg="LiteFS mounted to: /releaso_volume"
mia [info] level=INFO msg="waiting to connect to cluster"
mia [info] level=INFO msg="connected to cluster, ready"

## selects the primary node
mia [info] level=INFO msg="node is a candidate, automatically promoting to primary"
mia [info] level=INFO msg="node is already primary, skipping promotion"
mia [info] level=INFO msg="proxy server listening on: http://localhost:8080"

## runs the migrations
mia [info] level=INFO msg="executing command: /bin/db [migrate]"
mia [info] ✅ Migrations ran successfully

## starts the app
mia [info] level=INFO msg="starting background subprocess: /bin/app []"
mia [info] waiting for signal or subprocess to exit
mia [info] Server started at 0.0.0.0:3000
After connecting to LiteFS Cloud, the service mounted LiteFS to the volume at /releaso_volume. The service then waited to connect to the cluster and was eventually connected, indicating that it was ready to start serving requests.
The service then selected the primary node, with the node being a candidate for promotion to primary. However, the node was already the primary, so no promotion was necessary. The proxy server was then started and began listening on port 8080.
Next, the migrations were executed successfully, ensuring that the database schema was up-to-date. Finally, the app was started, with the server listening on port 3000.
These steps demonstrate the successful integration of LiteFS and LiteFS Cloud into our application.
Once LiteFS was mounted, we were able to interact with the database on the mount directory using SQLite clients or the sqlite3 CLI.
By running the command:
$ fly ssh console -a app_name
We were able to access the console of out Fly.io application, which displayed something like this:
Connecting to fdaa:2:7586:a7b:7a:fb85:e3de:2... complete
148e139f70e589:/bin#
Here, we could access the database by running:
148e139f70e589:/bin# sqlite3 /data/db/releaso.db
SQLite version 3.44.2 2023-11-24 11:41:44
Enter ".help" for usage hints.
sqlite>
Once we access to the database, it allows us to perform various operations such as creating tables, inserting data, and querying.
In our previous exploration of migrating from PostgreSQL to SQLite, we dove into topics such as Fly Volumes and SQLite functionality. However, we left a crucial aspect untouched: backups and database interactions. Integrating LiteFS and LiteFS Cloud into our application setup was a big step toward ensuring we didn’t lose any important data and are able to easily recover if something goes wrong. It’s like adding an extra layer of protection to our database system.
Embarking on this journey was interesting and we are looking forward to the challenges that this transformation will bring to our application, in addition of course, to the opportunities that this transition has open for us in the future.